Weak Airflow After Replacing a Cabin Filter: What to Check
If the vents feel weaker immediately after a cabin filter change, first compare the same HVAC settings, then check the exact replacement and its installation. Do not assume that the new medium is faulty, or compensate by leaving the filter out.
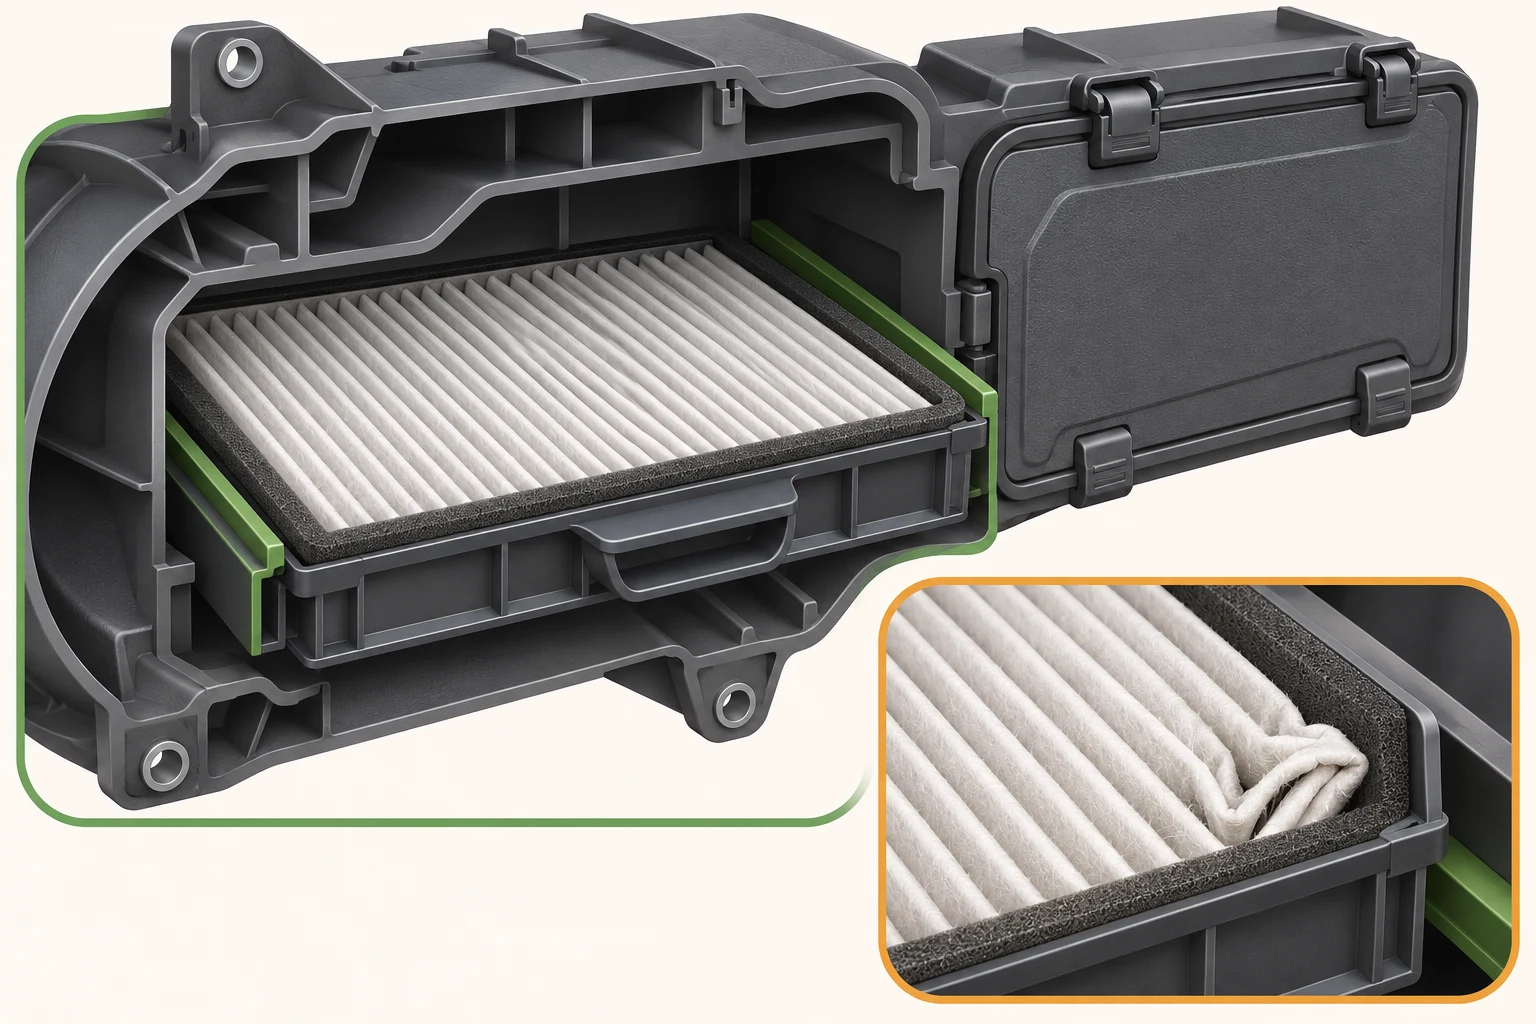
1. Make the comparison safe and repeatable
Note when the change began: immediately after fitting, after the first drive, or gradually over time. A close time relationship helps choose the first check, but does not establish the cause.
For a brief normal-operation comparison, keep fan speed, selected vents, fresh-air or recirculation mode and other HVAC settings the same. Automatic climate control can change blower output by itself. Record the settings rather than relying on memory. Do not compare different vent outlets or a cold start with a different operating condition.
Before opening the filter access area, switch off the vehicle and blower as directed by the vehicle manual. Follow its access procedure and keep fingers and loose objects away from the blower. Close and secure the housing before any normal-operation recheck.
References: DENSO: choosing and replacing a cabin air filter, DENSO: cabin air filter usage and installation precautions (Japanese)
2. Follow this inspection order
Use the sequence below to narrow the question. These are checks for a recent replacement, not instructions for dismantling a blower or diagnosing electrical faults. If access requires unfamiliar trim or moving doors, stop and use a qualified technician.
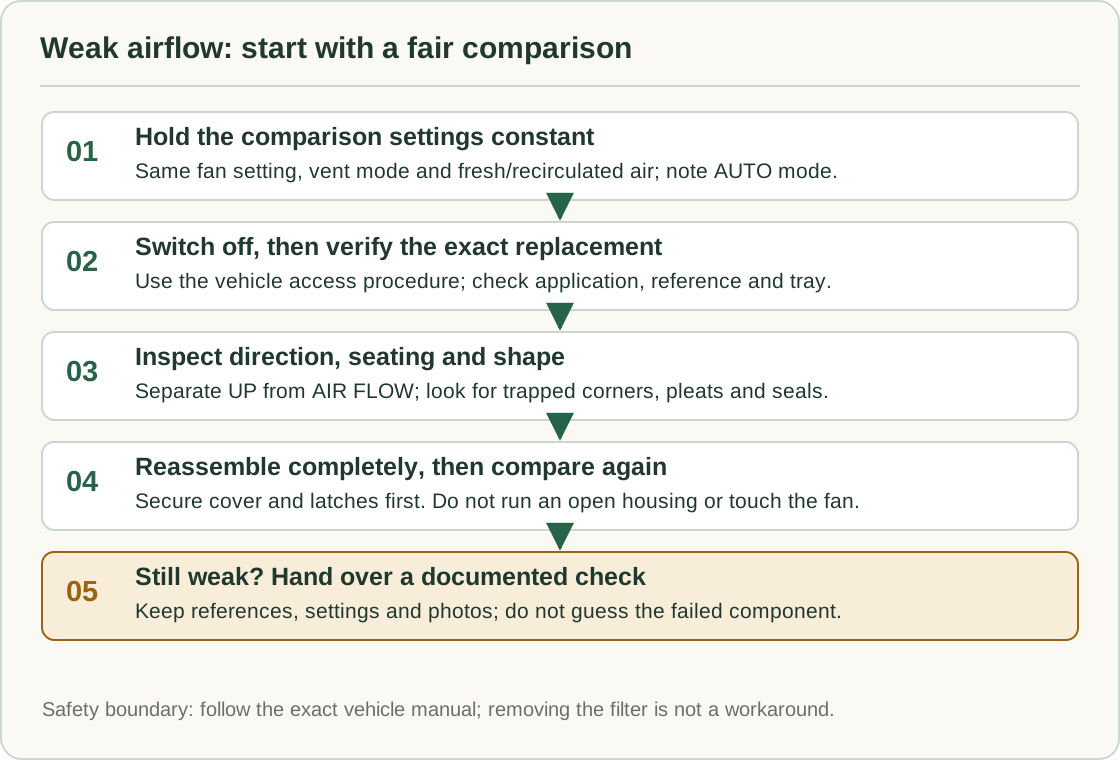
- Match the replacement reference to the exact vehicle, year range, market and relevant HVAC option. A similar-looking filter is not enough.
- Check for shipping packaging that the instructions require you to remove. Do not peel off a designed support layer or perimeter seal.
- Check the specified orientation and fully seated tray. “UP” identifies orientation; “AIR FLOW” identifies airflow direction. They are different instructions.
- Look for a trapped corner, collapsed pleats, a folded seal, displaced tray rails or debris at the access opening. Do not push debris deeper into the system.
- Refit the specified cover and latches, then repeat the same-settings comparison. If the issue remains, record it for further HVAC diagnosis.
References: DENSO: choosing and replacing a cabin air filter, DENSO: cabin air filter usage and installation precautions (Japanese)
Read UP and AIR FLOW arrows correctly · Check gaps, seals and a cover that will not close
3. Describe what is weak, rather than guessing a failed part
The observation is more useful when it names the affected outlets and modes. Neither this table nor a phone recording can establish that a particular motor, control module or door has failed.
| Observation | Useful next check | What it does not prove |
|---|---|---|
| Most outlets feel weaker at the same selected settings | Recheck the replacement identity, seating, deformation and complete assembly first. | A defective blower, or that all high-efficiency media restrict airflow excessively. |
| Only one outlet or one distribution mode changes | Record which mode and outlet; ask a technician to check the distribution system if installation checks do not explain it. | That replacing the cabin filter again will solve the problem. |
| New noise, a loose cover or an uneven fit appears | Switch off before inspecting; verify the tray, seal and cover engagement. | That forcing the cover or adding improvised foam is acceptable. |
| Weak airflow develops later | Record time in use and operating conditions; review the vehicle service instructions and inspect as specified. | A universal replacement interval for every vehicle and environment. |
4. If installation is correct, compare resistance on a stated basis
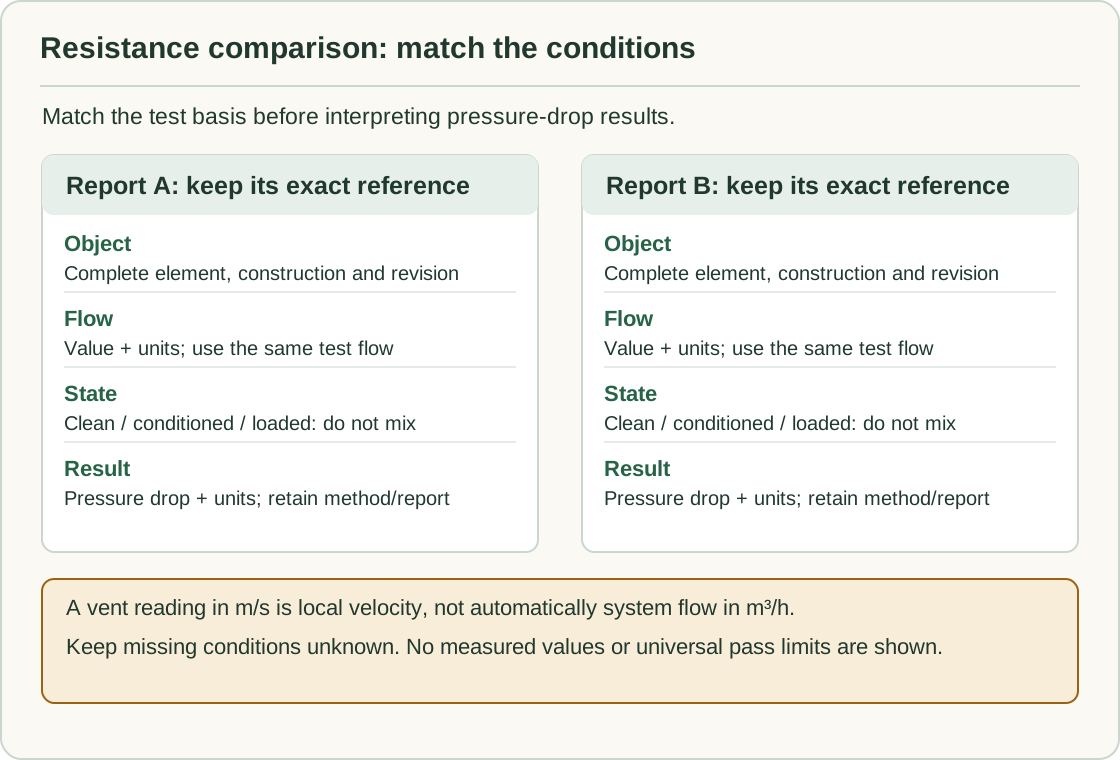
A useful supplier comparison names the complete filter and states pressure drop at the same airflow and loading condition. ISO/TS 11155-1 describes laboratory particulate testing that includes airflow restriction; a label such as “HEPA”, “carbon” or “premium” is not a pressure-drop result.
Ask for the exact element reference, tested configuration, flow units, pressure units and clean or loaded condition. Do not rank two filters using numbers taken at different flow rates. No universal pressure limit for your vehicle is established by this guide.
A hand-held reading in m/s at one vent is local air velocity. It is not automatically the total system airflow in m³/h. Without a defined measurement method, record a comparison as qualitative and retain the installation and setting details.
References: MANN+HUMMEL: cabin air filter purpose, function and system context, ISO/TS 11155-1:2001: particulate filtration laboratory testing
5. Give the installer or supplier a usable record
Keep one record for this replacement. Photograph only when the vehicle is safely stopped and the access procedure allows it. A reference written on the box should be linked to the actual fitted element, not treated as proof that it was installed correctly.
- Vehicle and relevant configuration; previous and new filter references; installation date.
- Settings used for the comparison, affected outlets, onset, and whether noise or a fit problem is present.
- Photos of markings, tray, perimeter and closed cover; note observations without inventing unavailable dimensions.
- Checks already completed, the result after reassembly, and any supplier report or instruction still needed.
Use the cabin filtration diagnostic record · Compare particulate and carbon media
Common questions
Should I drive without the filter to restore airflow?
Do not use removal as a workaround. Follow the vehicle maker’s procedure and have the installation or HVAC fault checked. This guide does not recommend operating an open housing or exposing a running blower.
Does a darker carbon filter necessarily cause weaker airflow?
Colour and a carbon label do not provide the pressure-drop measurement. Compare the actual complete elements at the same flow and condition, after confirming correct installation.
The new filter fits, but airflow is still weak. What next?
Record the same-settings result and the completed installation checks. Give these to a qualified technician; continued weakness can require diagnosis beyond the filter, and the symptom alone does not identify the failed component.
Sources & further reading
Check the current vehicle manual and the instructions supplied with the exact replacement filter. General guidance does not confirm a vehicle application.
For your next step
Comparing a specific filter? Keep the reference number, vehicle application and construction together when reviewing your options.